|
zTest Case Title |
TC1.22b: Create and configure a Snap4City SVG Custom Widget for real-time interaction |
|
Goal |
Create a Snap4City SVG custom widget and configure it to be embedded in a Snap4city dashboard. |
|
Prerequisites |
|
|
Expected successful result |
A Snap4City SVG custom widget is correctly shown in a dashboard and interact in realt time with the system. |
|
Steps |
See details below |
This is the second part of the tutorial that has the aim at training you in creating Snap4City SVG Custom widgets and to instantiate the Synoptic to be published into a Dashboard. The first part is available here: TC1.22a: Create and configure a Snap4City SVG Custom Widget for real-time interaction
Once the SVG file has been correctly created, it has to be uploaded on the platform as SVG template.
Please note that many different public templates are yet available on the the Snap4City platform and can be freely used. Otherwise, you can create your personal SVG template, as explianed before, and upload it on the platform and decide to make it public or not.
Upload a SVG template on Snap4City
Please note that to upload a new SVG custom widget you need to have at least the role AREA MANAGER. Users with role MANAGER cannot upload new SVG templates on the platform but can use public SVG templates.
After the Log In on the platform, on the main menu on the left, click on Extra Dashboard Widgets --> Register Custom Widget Template (1). As shown in the next image, the list of yet available SVG teamplates is shown as previews. As reported below each preview image, the SVG custom widget template shown can be: public SVG templates, SVG templates uploaded by you and delegated SVG templates. On the top right corner the "New Template" button (2) is available to upload a new SVG template.
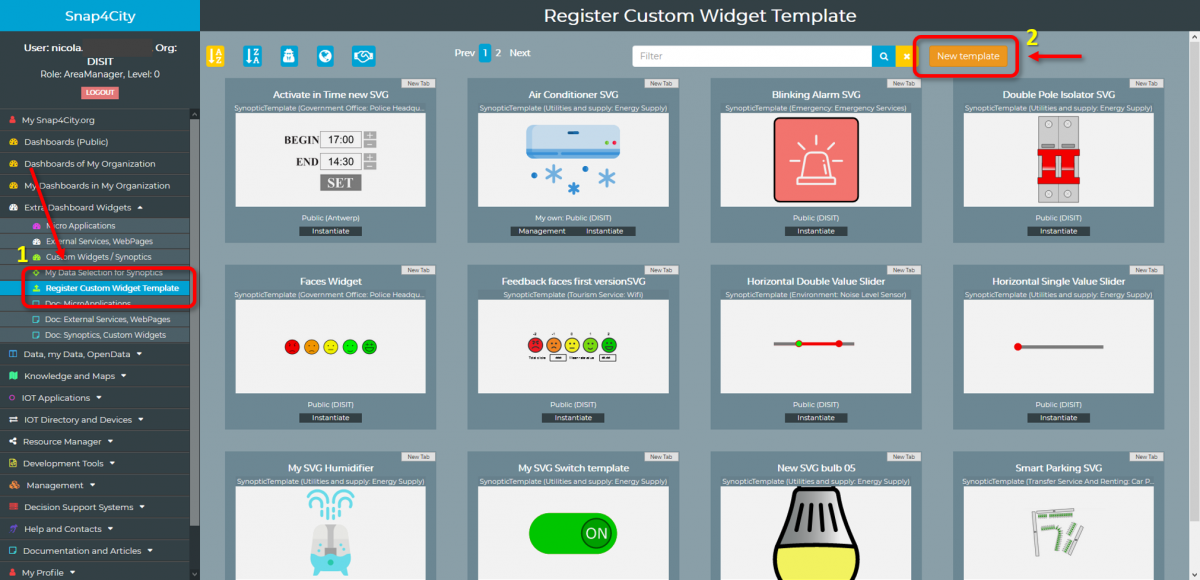
To upload a new SVG custom widget template, click on the "New template" button on the top right corner of the page. A new page is opened to be filled with the followign information:
- the name of the template (1)
- the corresponding Nature and Subnature (2)
- the field to load the SVG file from your PC (3)
- the field to load and image representing the SVG template to be shown in the SVG preview. This field is not mandatory. If no image is loaded, the preview will be taken from the SVG itself.

Once the SVG file has been selected and all mandatory fields have been filled, click the "Save" button (4).
Wait the confirmation message before to proceed. The new SVG is now available in the list of the Custom widget Templates.
Edit and instantiate a SVG Custom widget
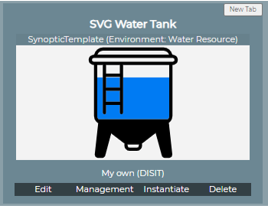
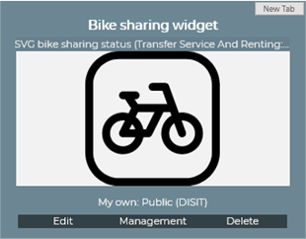
In the page with the list of SVG Custom Widgets, below each widget preview a number of buttons are available. These buttons are different according to the template status (private/public template, if you are the owner or not, etc.). If you are the owner of the SVG Custom Template and it is private, you see 4 buttons below the preview, as in the following image: Edit - Management - Instantiate - Delete.
On the top right corner of each SVG custom widget template a small "New Tab" button is available. By clicking it, the corresponding SVG image is opened in a new tab in the browser.
The Edit button allows to edit the template i.e. to update the Nature and Subnature of it or to load a new version of a SVG template or to update the preview image. The Edit page appears as in the following image. Click Save to confirm the update and wait for the confirmation message before to proceed.

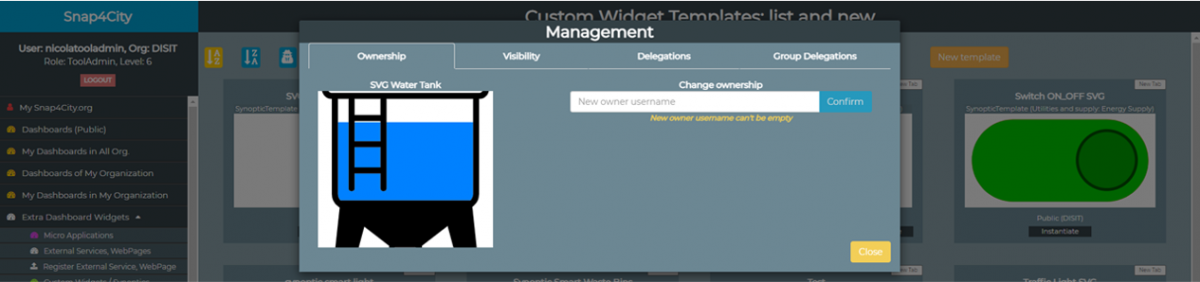
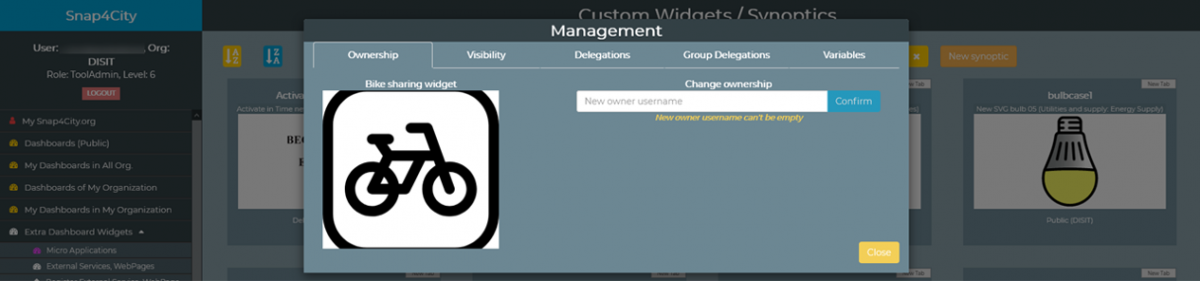
The Management button allows you to access to a number of tabs, as shown in the following image:
- Ownership: change the ownership of the SVG synoptic Tempalte by inserting the username of a Snap4City user that will become the new owner;
- Visibility: Define if the template is Public or Private. Public Templates can be used by all, private templates are not visible to the other users. Please note that new created templates are set as Private by default and only private templates can be edited.
- Delegations: in this tab it is possible to add usernames of yet registered Snap4City users to delegate them to access the specific private template selected.
- Group Delegation: delegation to access to private template can be provided also to all users registered to a specific group.
The Instantiate button allows you to create an instance of the SVG template to be used in your dashboards. To create a new instance of the template you have to specify a name of the specific instance. This page also shows all variables defined in the SVG template and, for each of them a dropdown list is shown that allows you to associate each single variable to a specific KPI.
Variables in the drop down list are sorted according to the following criteria:
- list of eventual sensors selected via the Data Inspector tool in widget modality (see ... for additional information regarding this functionality);
- list of your public KPIs sorted on the basis of the ascending ID ("My own - Public);
- list of your private KPIs sorted on the basis of the ascending ID ("My own - Private);
- list of the public KPIs sorted on the basis of the ascending ID ("Public");
- list of delegated KPIs sorted on the basis of the ascending ID ("Delegated - Private");
- list of the shared variables (see below for additional information regarding this funcionality).
Below the list of all KPIs in the dropdown list you find two addional items allowing to create a new shared variable to be associated to the template variable.

Also it is possible to set a static value to be defined immediately, as shown in the next image.

Click the "Save" button to create the SVG instance.
Please note that an SVG custom Widget Template can be also instantiated without specifying and selecting any variables from the dropdown lists, for example in the case you would interact with the SVG variables directly via an IOT App.
For additional information regarding the possible connection and interaction from Synoptic (read as SVG Custom Widgets) and the rest of the Snap4City infrastructure please, refer to this page: TC9.19: Custom Widgets / Synoptics controlled by IOT Applications.
All instantiated templates are available by clicking on the left column menu item Extra Dashboard Widgets --> Custom Widgets / Synoptics. This page shows all public instances, delegated instances by other users and clearly your own widgets/synoptics.
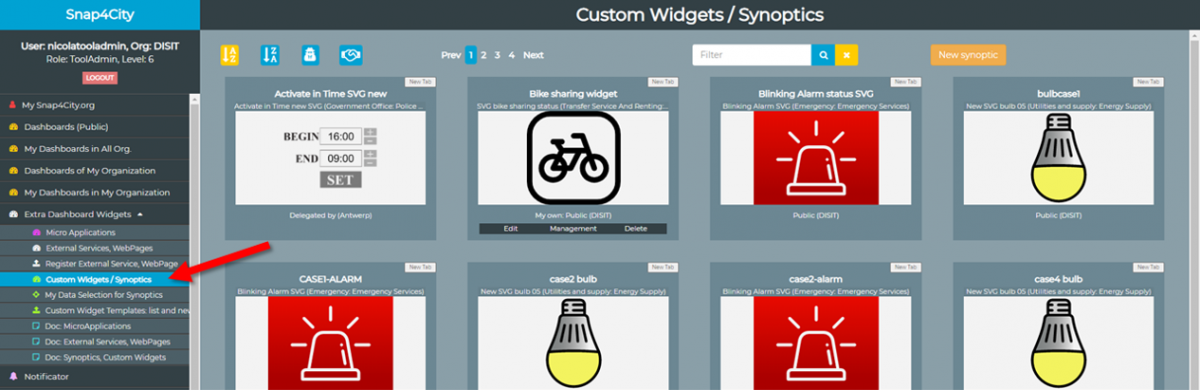
On the top right corner of each custom widget synoptic a "New Tab" button is available. By clicking it, the corresponding custom widget/synoptic is opened in a new tab. Since instances can be typically connected with variables, in case of connection the custom widget synoptic shown is cohehrent with the data received.
Public and delegated custom widget/synoptic previews can be only seen and no buttons are available below them. For custom widget/synoptics of which you are the owner, buttons are available below each image preview, as shown in the image below.
The Edit button allows to edit the custom widget/synoptic variable setting, as described above for the instantion of a SVG custom template.
The Management button allows you to access to a number of tabs, as shown in the following image:
- Ownership: change the ownership of the custom widget/synoptic by inserting the username of a Snap4City user that will become the new owner;
- Visibility: define if the custom widget/synoptic is Public or Private. Public custom widget synoptic can be used by all and integrated in any dashbaords, while private synoptics are not visible to the other users, also if included in public dashboards. Please note that new created custom widgets/synoptics are set as Private by default.
- Delegations: in this tab it is possible to add usernames of yet registered Snap4City users to delegate them to access the specific private template selected.
- Group Delegation: delegation to access to private custom widgets/synoptics can be provided also to all users registered to a specific group.
- Variables: shows a table representing a summary of the SVG template variables in read/write and the corresponding KPIs associated to them, if available (see next image).

How to use a Snap4City SVG Custom Widget
Case 1: SVG interaction via a MyKPI on Snap4City
Step 1: Create KPIs
Now on the Snap4City platform it is necessary to define the new MyKPI, according to the new defined attributes in the SVG file. So that, we need to create the following new three KPI:
- A KPI representing the value received from the feedback of the user. Each time a user click on a face, the system will receive one of the possible values: -2, -1, 0, 1 or 2.
- A KPI representing the total number of clicks. We will see later how to calculate this KPI.
- A KPI representing the mean rate value calculated on the basis of the feedback received. We will see later how to calculate this KPI.
This SVG custom widget is based on variables that are generated via an IOT App. In particular the total number of clicks and the mean rate value are generated via an IOT App that is described later.
To create the new three KPIs, follow this steps:
- Login in the Snap4City platform (https://www.sna@4city.org) and, on the left column menu, click on My Data, KPI, POI item;
- Click on the Add My KPI button on the top of the page;
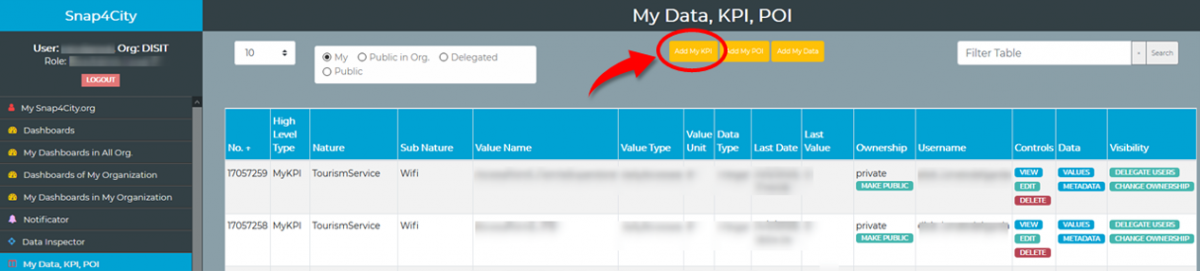
- Fill in the form to add the new KPI according to the Nature and Sub-Nature of the data to be managed;
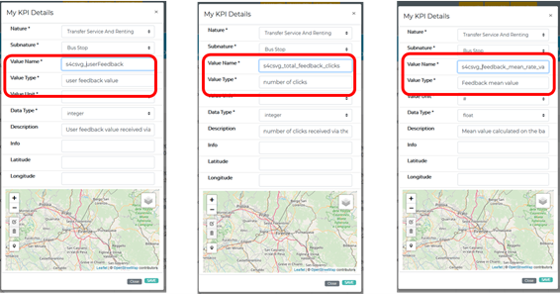
- As value name use the same attributes name define before and click Save. For example:
- s4csvg_userFeedback, for the feedback received from the user;
- s4csvg_total_feedback_clicks;
- s4csvg_feedback_mean_rate_value.
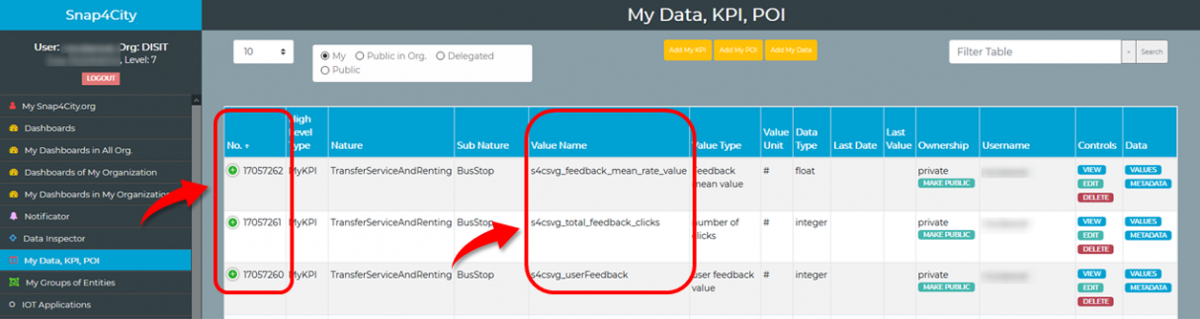
- The new KPI have been now created. Take a note of the number of new KPIs, that is available in the first column of the table with the list of your KPIs.
Step 2: Instantiate the Synoptic
- On the main menu on the left, click on Extra Dashboard Widgets --> Custom Widget Template;
- Click on the Insantiate button below the preview icon of your interest;
- In the new page, write a Name of the SVG Custom Widget and connect each SVG variable to a KPI by selecting it from the drop down list;
- Click Save and wait for the confirmation message.
Step 3: Create the dashboard

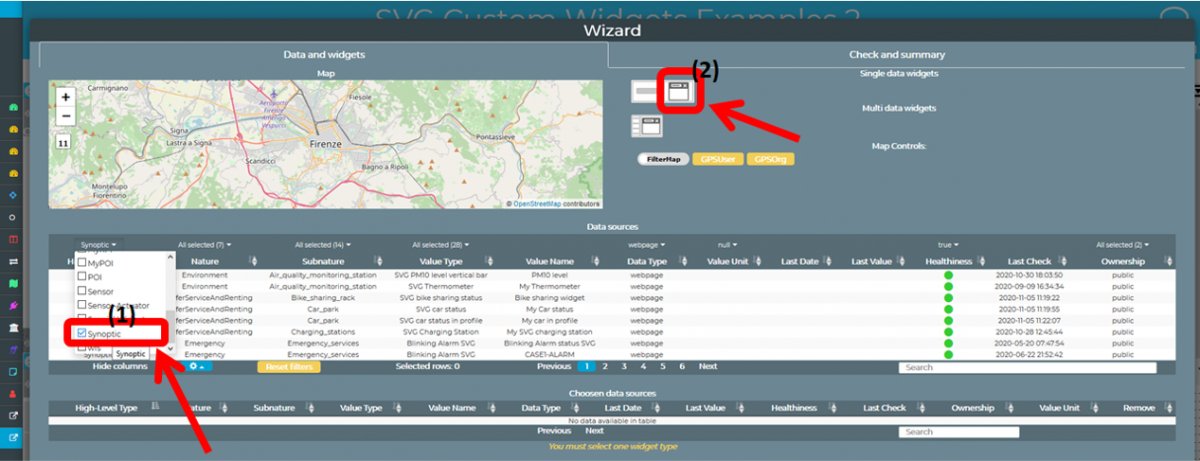
- As shown in the next image, enter in the Wizard tool and in the Data Source table, in the first column on the left "High Level Type" filter the list by selecting only the synoptic item (1). The list in the Data sources table will be updated accordingly and only the widget/synoptics will be shown. Also the small preview of compatible widget templates on the right of the map will be updated (2). In particular the External Content widget (2) has to be clicked to be selected since the SVG widget/synoptinc will be shown embedded in this External Content template.
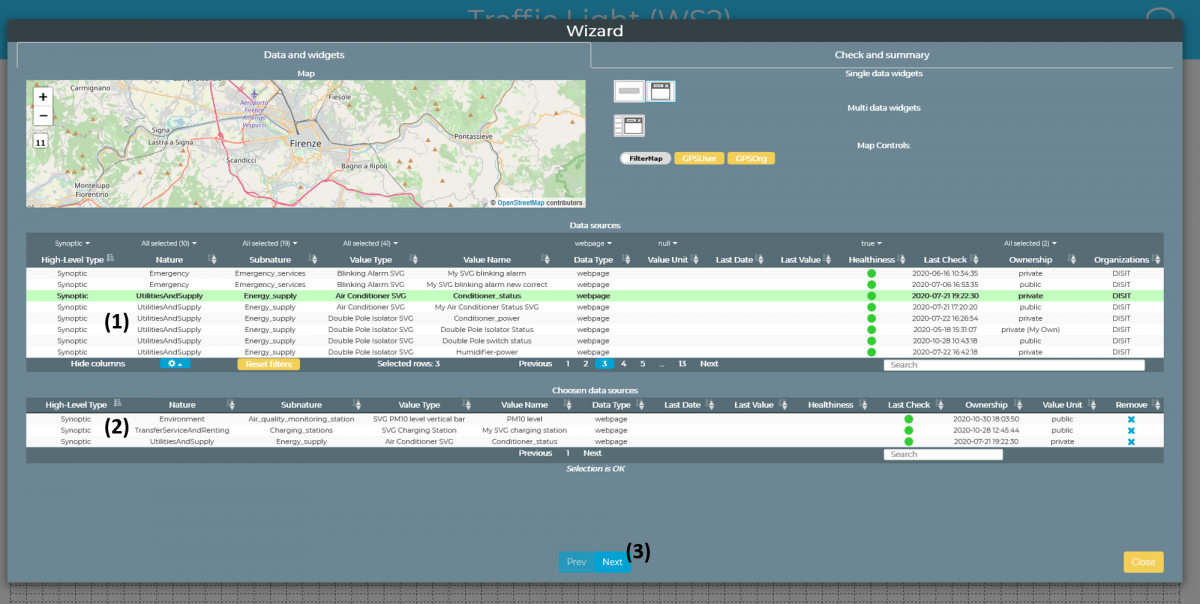
- As shown in the next image, select one or more synoptics items to be shown in the dashboard by selecting it/them in the Data Source table (1). The selected synoptic(s) item(s) will be shown also in the "Choosen data source" table (2). Click the Next button to confirm (3).
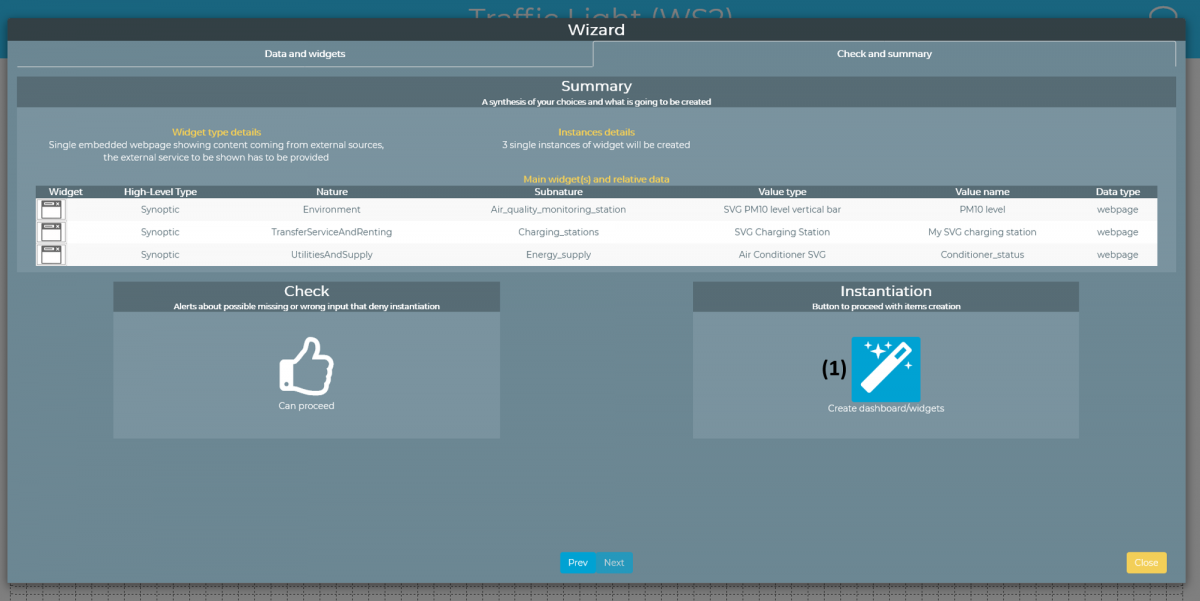
- The confirmation page will be shown, summirising the selected widgets and synoptic(s) to be shown in the dashboard. Click the Instantion button (1) to proceed.
Case 2: direct SVG interaction via IOT Application on Snap4City
To speed up the process, synoptic' variables can be connected directly in read/write via specific Node-RED nodes of Snap4City for communicating with Synoptics.
To this aim, specific MicroServices (of the Snap4City library on official Node-RED Palette) have been implemented, as shown below:
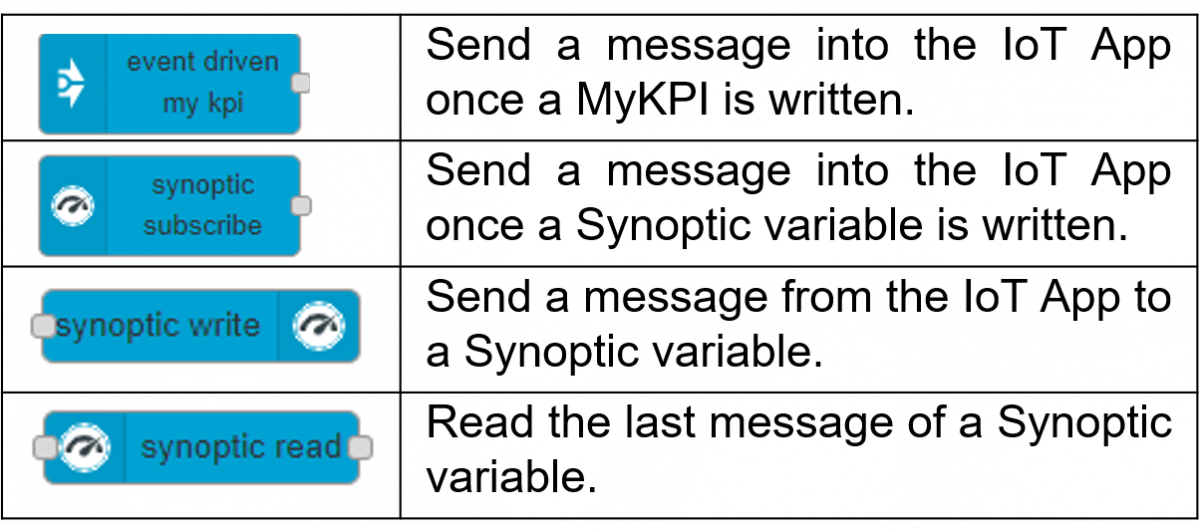
Case 3: direct SVG interaction via WS
In this case the Custom Widget Synoptics are connected with the WS Server that directly shortcut the reading with the writing and thus the loop is close in nearly real time, whitsout passing via an IOT App.
This modality has to be used only for the user interaction and has to be avoided in normal cases since it is specific for specific closed domains.
To implement this modality, during the widget instantion the list of the shared variables has to be set and connected to the custom widget variable.
In particular, during the widget instantion, below the list of all KPIs in the dropdown list it is possible to create a new shared variable to be associated to the template variable or connect a yet available shared variable.