To understand better this guide, we suggest you to read “DOC: IOT Directory and Devices” .
An External Context Broker is a Context Broker, which is not controlled by a Snap4City’s user.
The purpose of this guide is give an example ready to use for the registration of a External Context Broker and its devices. We use a main case use to make easier following steps.
CASE USE: An user should register a Broker of an organization X and wants to add all its device, which have a known SDMs.
FIRST STEP: Add the External Broker
After the log in into the Platform Snap4City, the path that the user must following is:
“MENU > IOT Directory and Devices > IOT Brokers”
Here he/she can clicks on the button “Register new IOT Broker” and fill each fields as is shown.
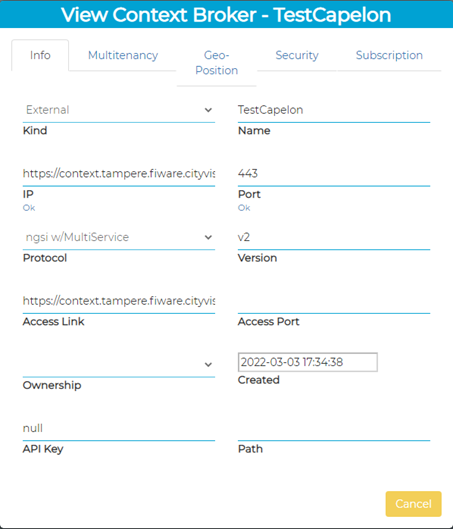
Note that: an external context broker is identified by service uri and in the case of multi-tenancy broker with the couple service uri and service path.
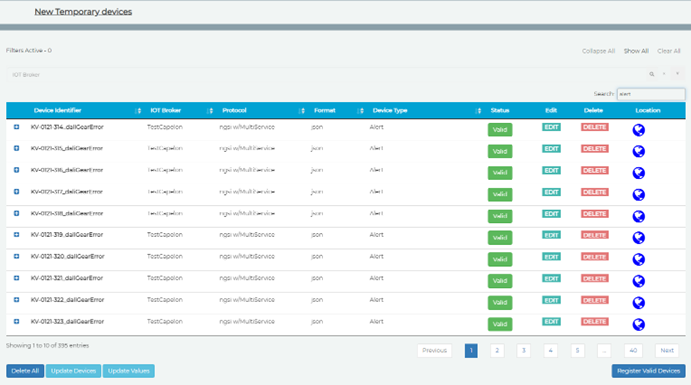
SECOND STEP: Harvest devices
Following the path:
“MENU > IOT Directory and Devices > EXT. Broker Devs Periodic Update”
The user can see a analogues table, WHICH shows all the list of devices under control of the same External Broker.
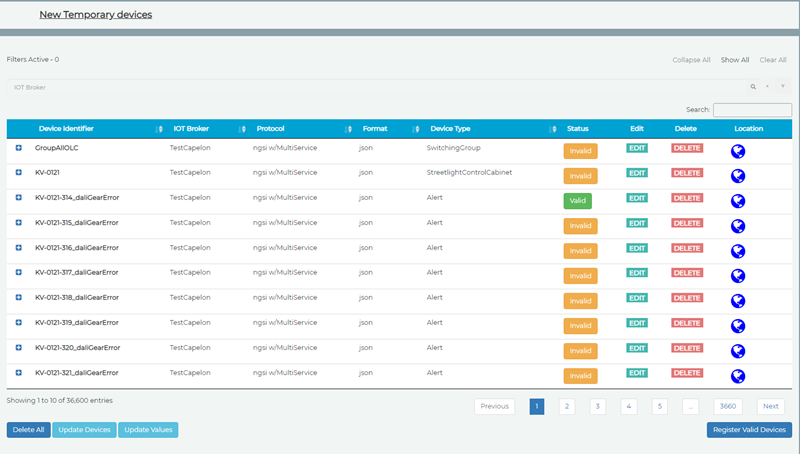
The column ‘Status’ informs about the ready-status of each device. If it is green, the device is ready to add, it happen because of applying of the pre-saved rule. In other words, if the system recognizes the model on device, it sets appropriately all the parameters for each attribute of each model. So, the user can add this specific device, clicking on “Valid” and then on “Register the device” on the pop up.

If the color of button is orange, the platform needs to know additional information to instance the smart object. Clicking on the “Invalid”, a pop up shows up with the list of invalid fields. As is shown below:

To fix each problem, the user have two ways:
Click on the edit button of the device’s row and fill the form appropriately.
Make a Rule and if he/she wants save it. (See third step).
THIRD STEP: Rule generator
Clicking on the button “Update Values”, the below form appears:
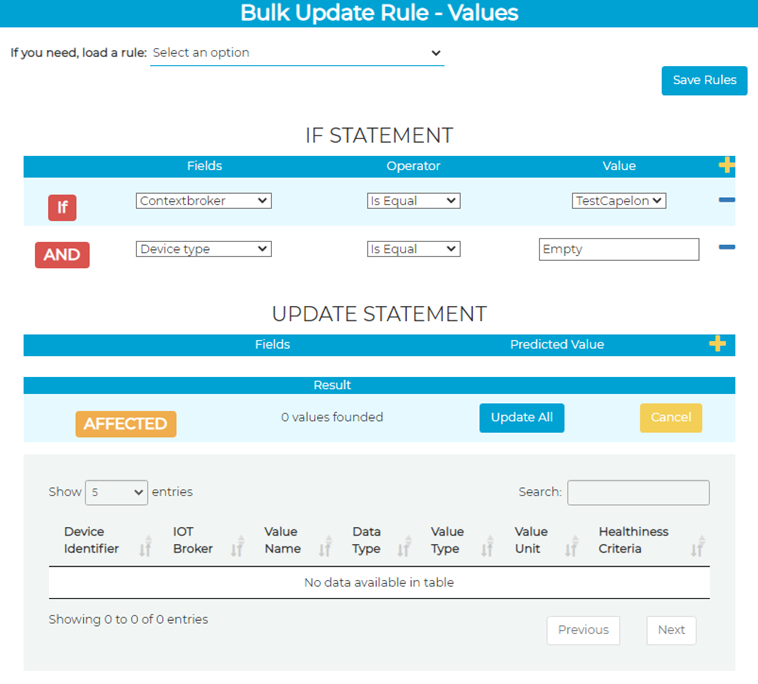
In this form, the user can:
- load a pre-salved rule.
- Click on the select and choose the wanted rule.
- build a new rule and save it.
- Building: click on the ‘+’ button and add all the rows wants. For example:
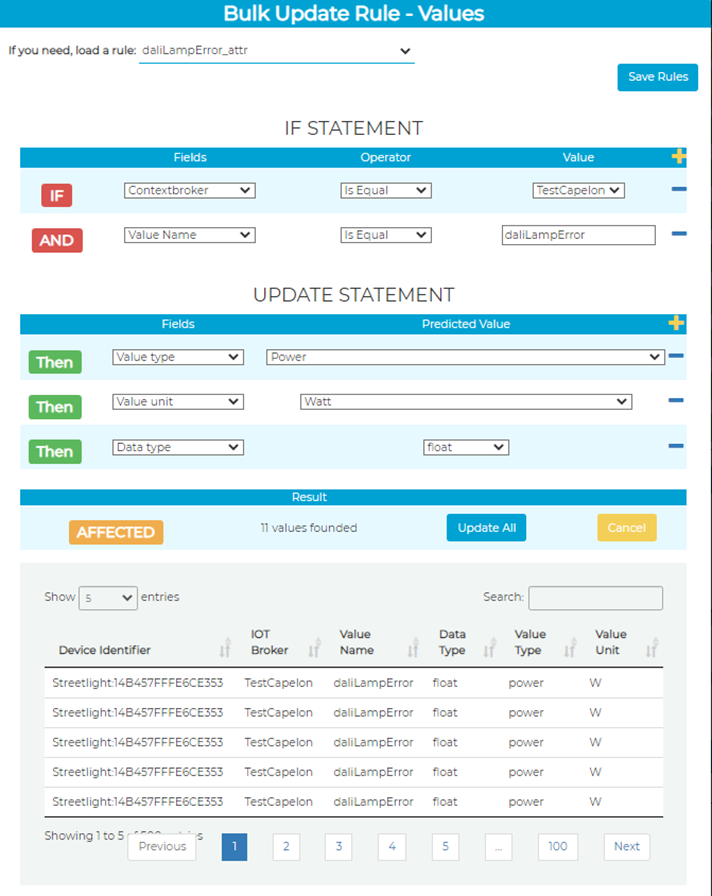
In any case when the user click on the “Update All” button, all the changes are done.
FOURTH STEP: Rule generator
Once all the problems are solved, the table appears like this:
So, the user can register all the valid device clicking on the button “Register Valid Devices” and then ok.

Now, the user can be found on the table at the branch:
“MENU > IOT Directory and Devices > IOT Devices”
So, they can be used like other devices.