This page is strictly related to the following webpages:
- TC1.19: Creating and Exploit heatmaps for Dashboards and as reference data services: https://www.snap4city.org/457
- HOW TO: produce heatmaps, custom heatmaps on any data: https://www.snap4city.org/641
New important functionalities have been added to the Colormap Manager tool.
Now authorized users can autonomously define colormaps in the editor and add and image to be used as legenda. The colormap and the corresponding legenda are automatically shown in the corresponding map and all the process is now managed automatically by the platform.
1. THE COLORMAP EDITOR
In the Data Management, HLT item in the main menu, click on ColorMap Manager to open the ColorMap tool. The following image shows the ColorMap Manager tool for a simple user.
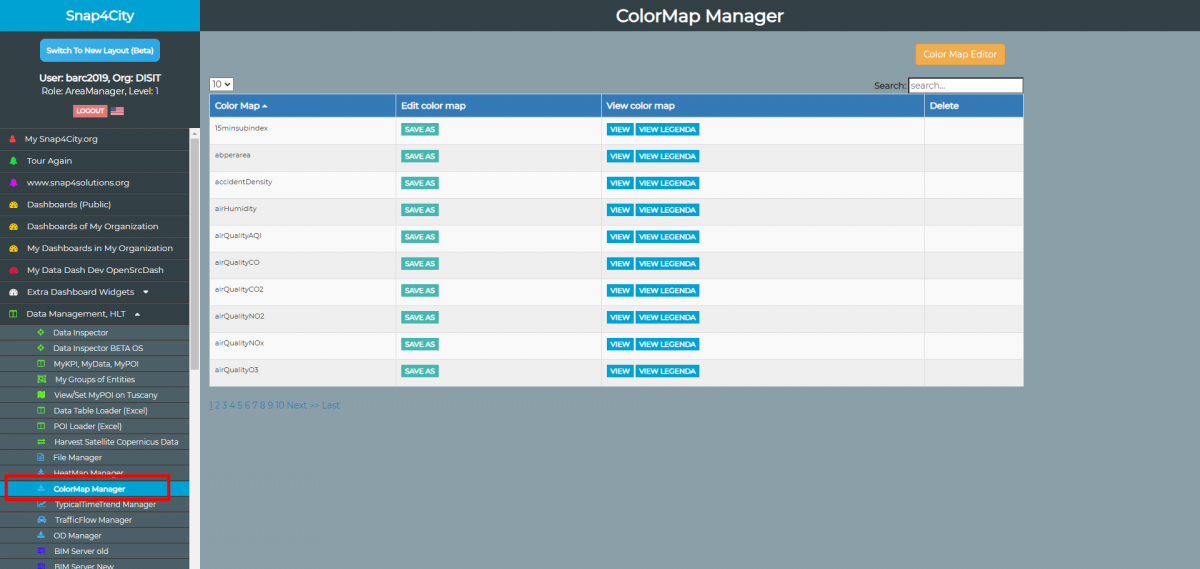
As shown in the previous image, the table for simple users is now divided in the following columns:
- Color Map: it contains the colormap name. Please note that this name has to be the same of the heatmap metric;
- Edit color map: the SAVE AS button allows to clone the selected colormap in a new one that can be edited by the user;
- View color map: Click the VIEW button to see the defined colormap. Click the “VIEW LEGENDA” button to open the image of the colormap legenda
- Delete: is empty for not authorised users.
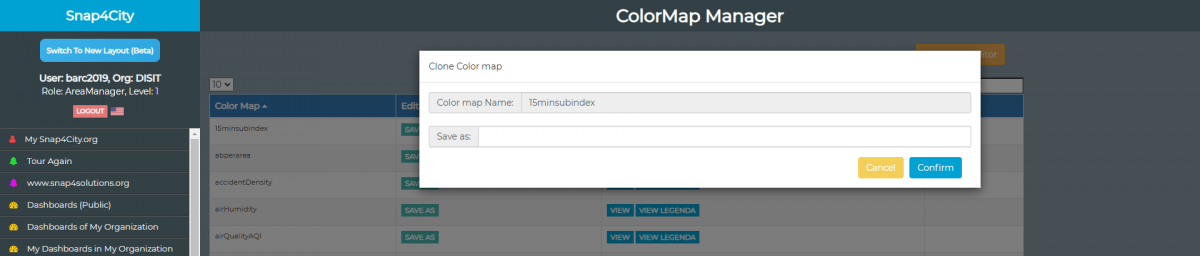
By clicking the SAVE AS button a pop up is shown allowing the user to clone the selected colormap and to save it with a different name.
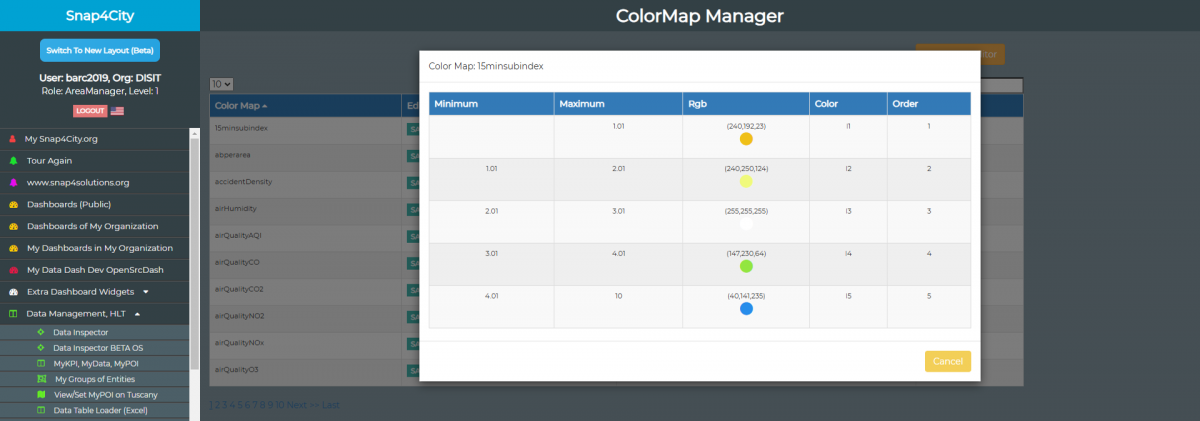
The VIEW button opens a pop up showing the details of the selected colormap
The VIEW LEGENDA button opens the uploaded image of the corresponding legenda

If an image of the legenda has not been uploaded, a message is shown.

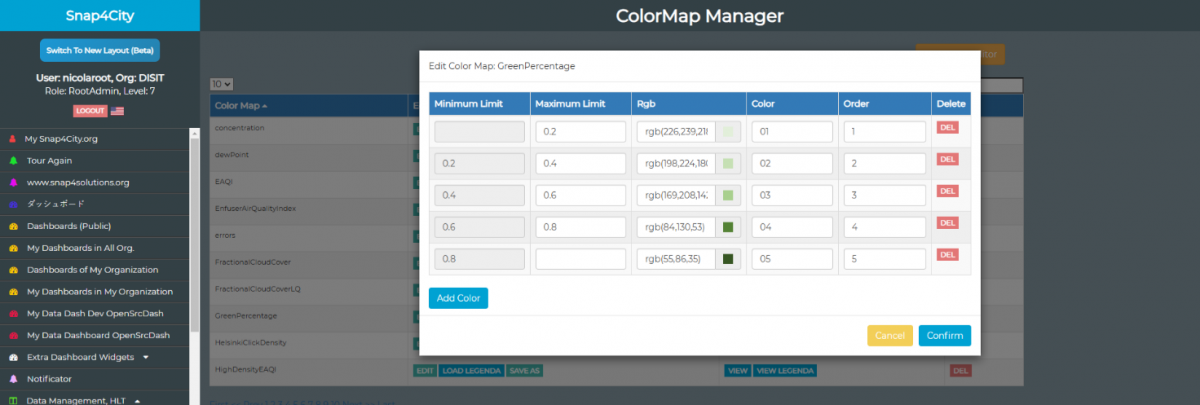
2. CREATE A NEW COLORMAP
On the top right corner a button to create a new color map is available. By clicking the COLOR MAP EDITOR button, the tool for creating a new color map is opened.
- Insert a colormap name. The name has to be the same of the heatmap metric.
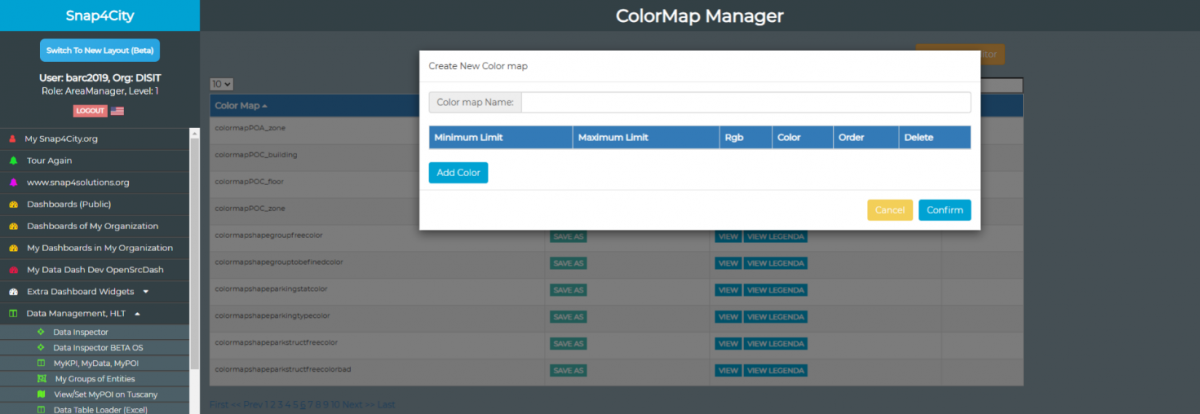
- Click the ADD COLOR button to add a new color in the legenda. For each line/color you have to fill in the following fields (from left to right):
- The Maximum Limit value
- The corresponding color expressed in RGB
- A name
- The order number
The Minimum Limit is filled automatically by the system.
Click CONFIRM to save the colormap.
The following image shows an example of heatmap colormap.
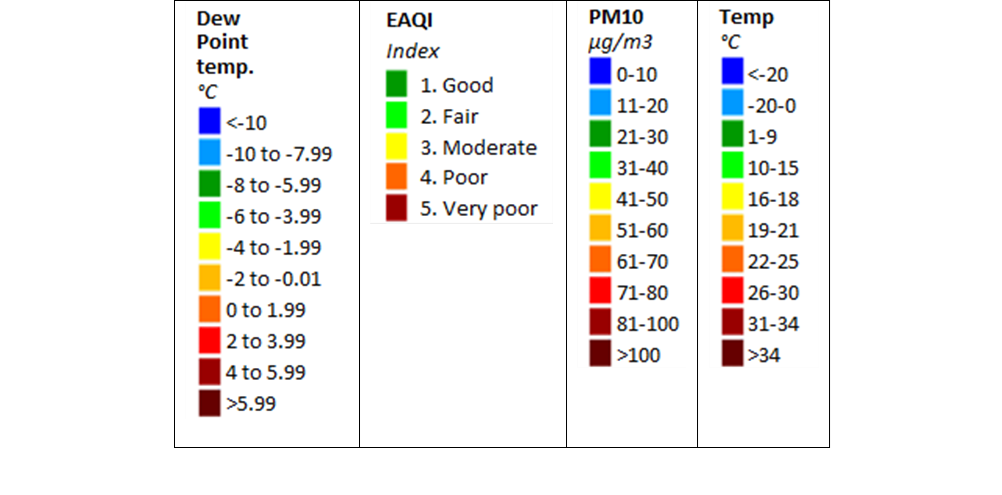
3. UPLOAD A COLORMAP LEGENDA
Authorized users can upload an image representing the colormap legenda. The legenda is shown in the bottom left corner on the widget map in the dashboard when the corresponding heatmap is loaded.
The legenda image has to be realised by using an external image tool and has to be in .PNG format.
In the following some examples of legenda images are shown.
To upload a legenda image in the system click on the LOAD LEGENDA button in the ColorMap Manager.

A pop up is shown that allows to select the image to be loaded.

Click CONFIRM to upload the file and close the pop up, or CANCEL to abort.