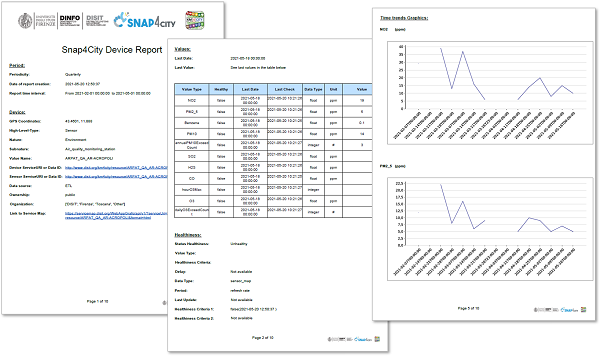
Snap4City integrates the possibility to generate and download periodic reports useful to have a consumptive views on the platform status on specific programmable aspects for users and administrators, for example at level of IoT Devices. Actually it is possible to generate reports related to sensor devices.
This manual is divided in three main parts as follow:
- How to create a Snap4City Report Model (this page). This part is aimed at a developer user.
- How to activate and download a Report. This part is aimed at a final user/manager.
- How to manage the Report generator (for administrator user)
1) How to create a Snap4City Report Model
For the report generation and management, Snap4City integrates the open source reporting engine TIBCO Jaspersoft.
The definition of a report structure is done by defining a template for the generation of reports through a graphic editing software called TIBCO Jaspersoft Studio. It allows the creation of a project for the definition of a report template through a graphical interface providing the user with the ability to manipulate the data received as input from a data source and customizing the report layout by adding elements such as fields of text, images, tables, graphics, etc.
Once the template has been defined, two files are generated by the tool: a .jrxml markup file with the file structure and a .jasper format file with their implementation.
More information on the features of these software, consult the following links: Jaspersoft Studio: https://www.jaspersoft.com/products/jaspersoft-studio
Files created with the TIBCO Jaspersoft Studio editor can be made available by publishing them on the TIBCO JasperReports Server, that is the tool generating output files on the basis of the defined templates and that manage the scheduling process implemented in which predefined time intervals are set to create the reports asynchronously.
More information on the features of these software, consult the following links: JasperReports Server: https://www.jaspersoft.com/products/jasperreports-server
Snap4City integrates an installation of JasperReports tools that are accessible only to the RootAdmin user.
NOTE: If you are interested to activate the production of reports for specific device, please ask to your RootAdmin
Jaspersoft Studio uses Java as a programming language and creates files in a markup language called jrxml for defining the page layout and a file in jasper format for the implementation of scripts. The user can modify and manipulate the layout of the project from a graphical interface through an element console, and by modifying the tags of the markup file.
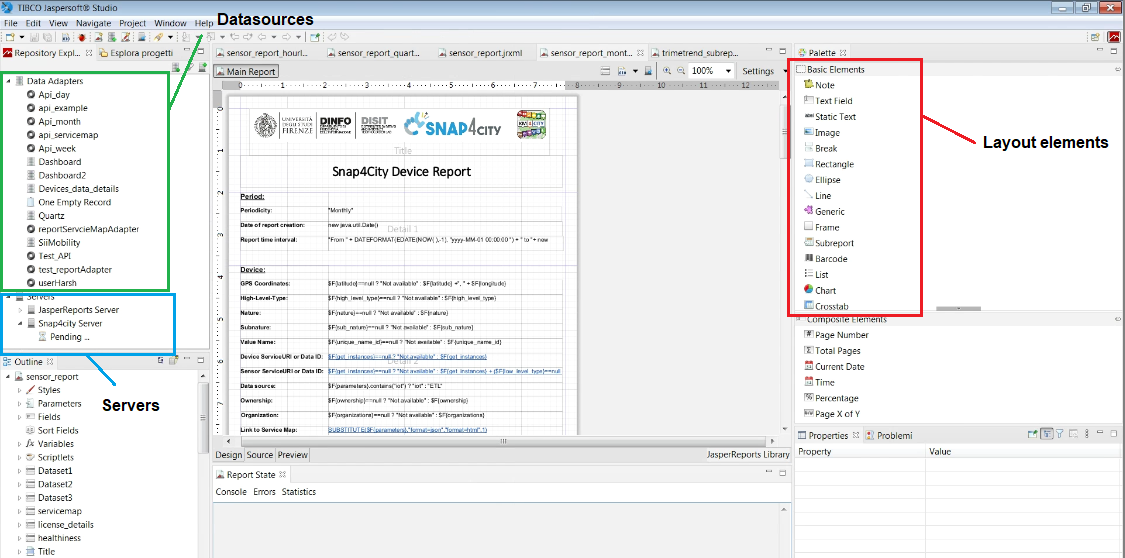
The tool allows also to work in two modalities that can be selected by clicking in the corresponding tab below the main view in the middle: in Design mode a graphic panel with the structure of the project is available (see image above); in Source mode it is possible to view the tags of the jrxml file. A Preview tab is also available that allows the user to view a view of the report.
Data Adapters
In order to process data from an external data source (for example a mysql database or a json file), each template requires a Data adapter, i.e. an object within the project that defines the connection with the data source (for example the location of a database and access credentials). Commonly when creating a new report project, the user is asked to define which data adapter will be used to obtain the data to fill the report, asking, depending on the type of data source, to also specify through a query or filter what data fields are to be made available.
To create a new data adapter:
- Select the File> New> Data Adapter options from the menu bar
- Select the directory where you want to save the data adapter and the xml file name, then click the Next> button
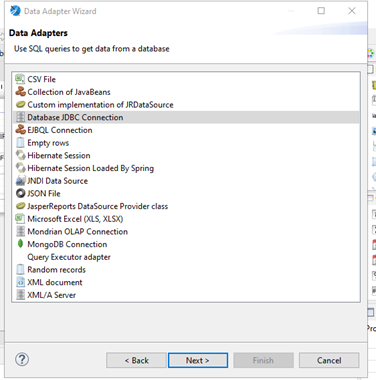
- Select the type of data sources, for example "JDBC Connection Database" for relational databases, then click Next>
According to the type of data sources chosen, the user must enter parameters to establish a connection. For example, in the case of a Database JDBC Connection, the user has to enter the URL of the database and the login credentials. There is also a "Test" button to check if the connection was successful. Click Finish to confrirm.
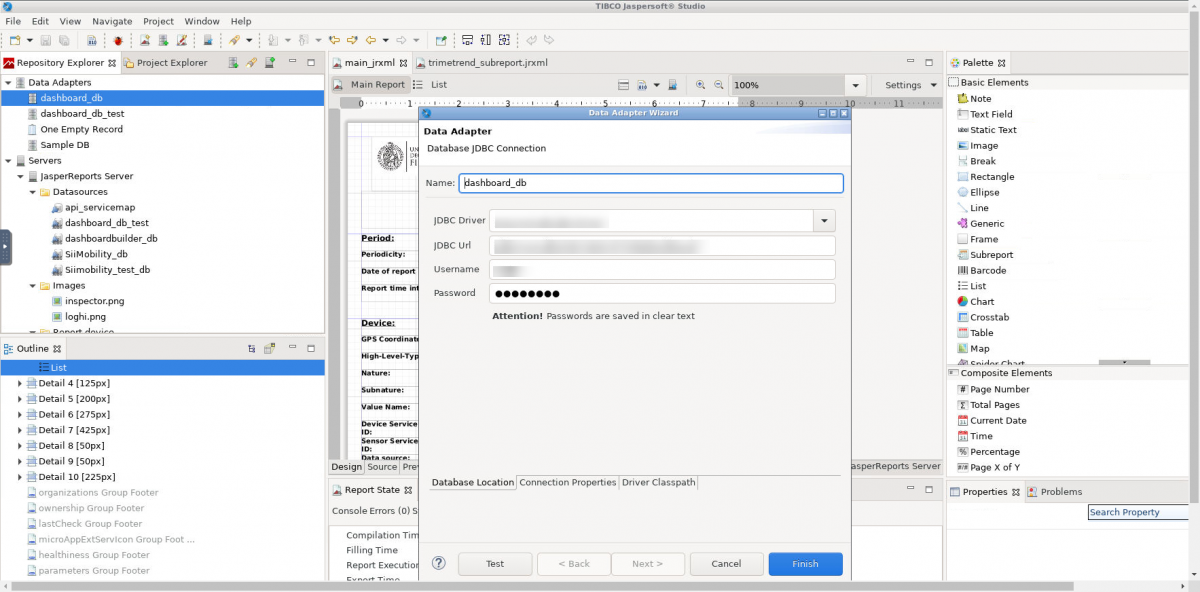
the JDBC driver is typically: org.mariadb.jdbc.Driver, connection url can be something similar to: jdbc:mysql://xx.xx.xx.xx:3306/Dashboard?tinyInt1isBit=false
For the IP xx.xx.xx.xx, Username and password: please ask to the platform administrator.
The saved data adapter is available in the upper left section of the user interface, in the Repository Explorer tab. Settings of the Data Adapter can be modified by right clicking on it and selecting the "Edit Data Adapter" menu option. The created data adapters can now be used by all JasperSoft Studio projects templates.
Project creation
To create a new report template it is necessary to create a ne proejct.
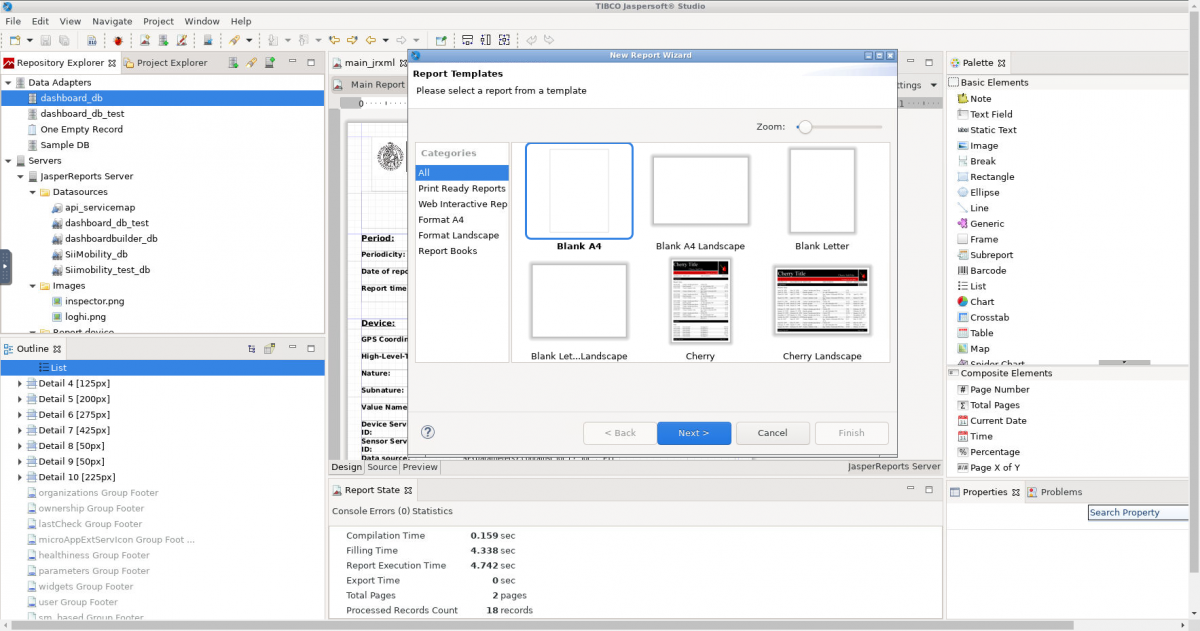
- Click on the File> New> Jasper Report menu bar;
- Select a category template. The tool provides some blank and other pre-compiled templates with different formats. Click Next>;
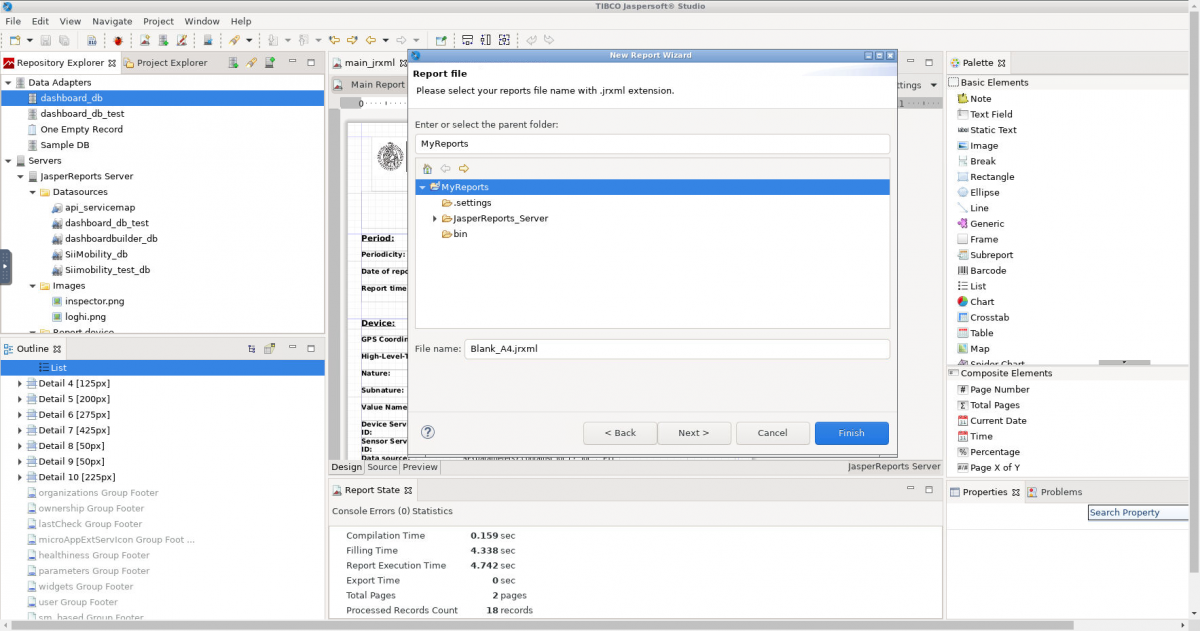
- Choose a name for the .jrxml file and click Next>;
- Choose one of the previously created Data Adapters. It is also possible to create a report without a data adapter if it is not necessary, but this could complicate the data extraction.
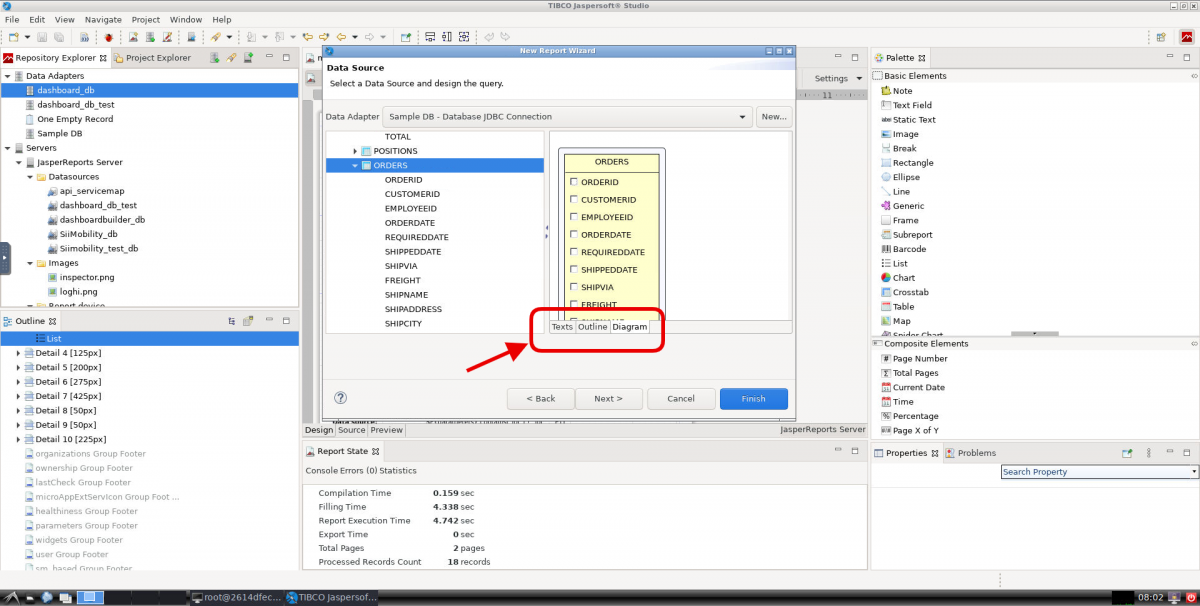
- Select the datasources fields needed to get the report fields. Different possibilities to add a data source are available, according to the small tabs available below the area on the left (see next image). This menu varies according to the type of datasources selected. In this case, a SQL database is used as example and it is possible to select tables or perform queries. Select Finish.
The project has been created and an empty template page is now shown in the graphic interface to be filled in the fields obtained from the datasources and with many types of graphic elements.
Additional information are available in the official TIBCO Jaspersoft Studio User Guide: Data Sources
Queries and parameters
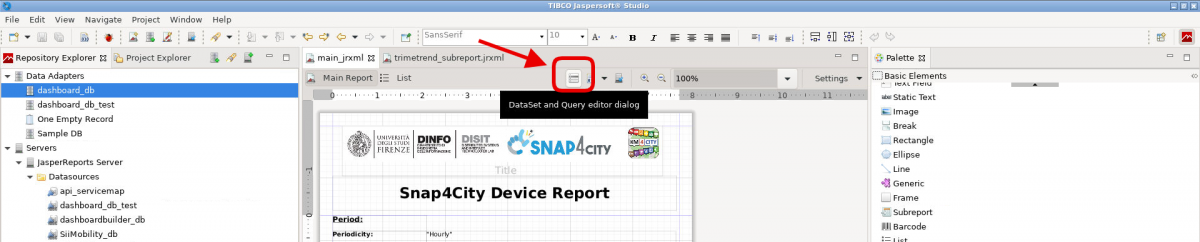
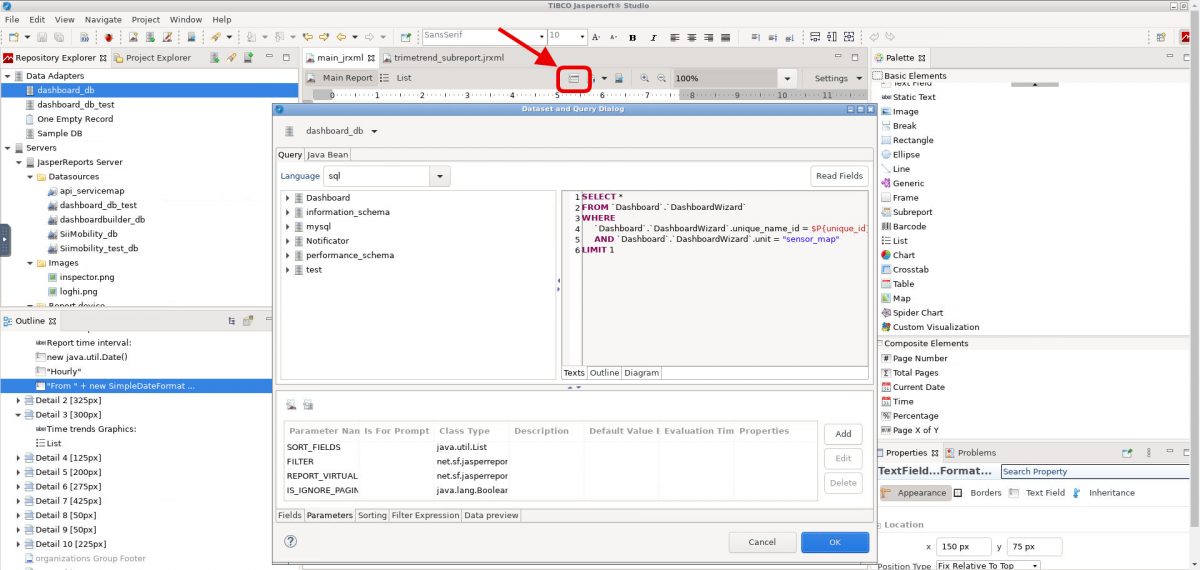
In Jasper Studio is now possible to specify queries and parameters to be used to recover specific data from the Data Source by using the Dataset and Query editor dialog available by clicking the specific small button above the report preview (see next image).
Parameters can also be inherited from the main report to subreports or other elements.
In the case of the reports created above, the only parameter requested by the user corresponds to the identification of the sensor devices, i.e. the "Value Name" in the Snap4City Data Inspector interface. This value is used to extract data from various databases.
Report Layout
The layout of a report is divided into several sections representing various elements of the template, such as the header, the footer, section titles, the summary, etc. The data filling is generally in the Details elements. Multiple detail elements can be created in a project.
The list of elements to be used to define the template layout is shown on the top right column named Palette that is divided in two parts, Basic Elements and Composite Elements. For more details on how to define the layout of a projects, see also the TIBCO Jaspersoft report documentation.
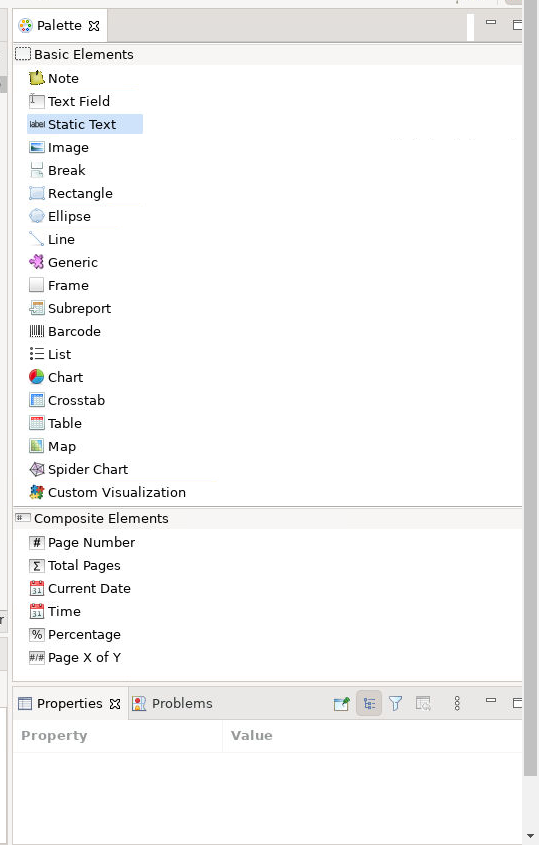
The most used basic element useful to show values of the database fields is the "Text field" element. It is possible to show data fields and insert java expressions. Basic data processingFields are represented by the expression $F{name_field}.
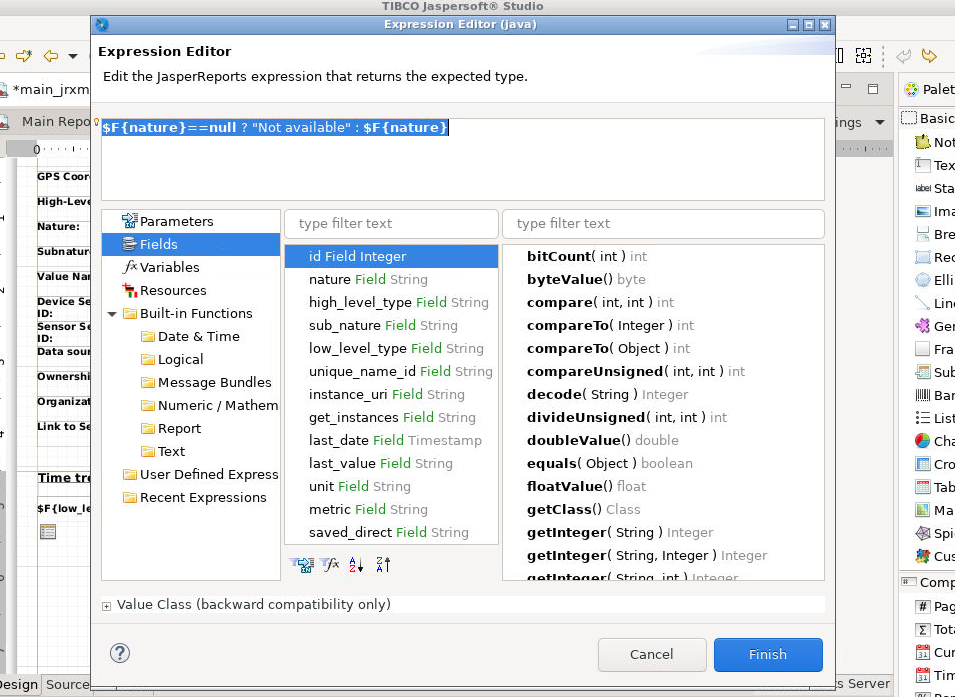
The expression shown in the example above is used to show the data field nature in a text field, with a condition that states that if this value is null, then the string "Not available" is shown in the project layout.
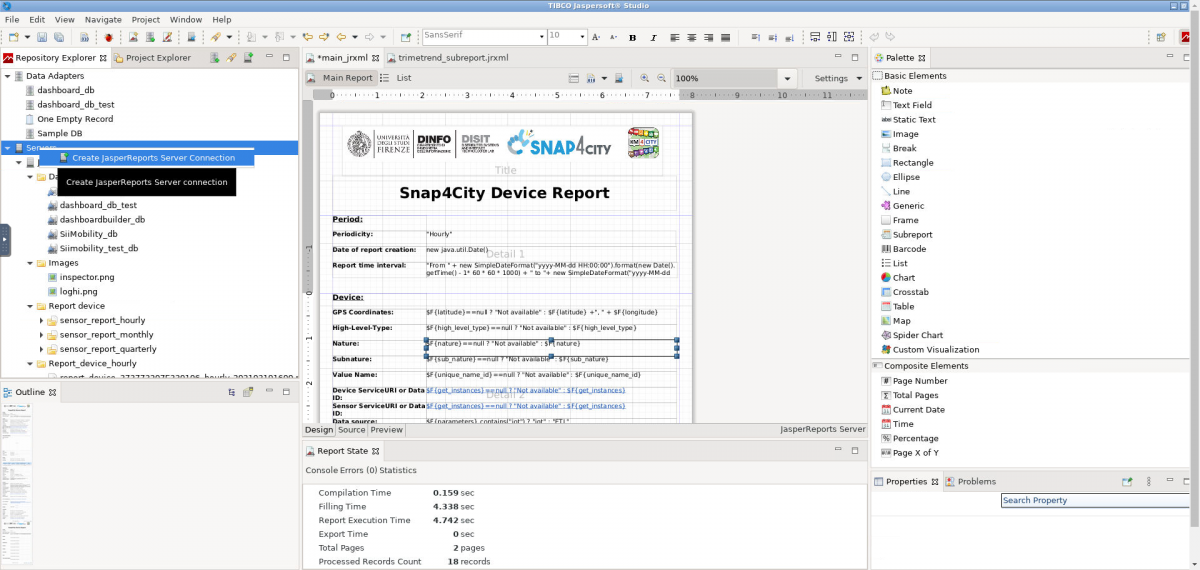
Publish the report on the server
To upload the project files or to update the changes made in a report template it is necessary to define a connection between the Jasper Studio and a Jasper Server, by using the Create a JasperReports server connection option, as shown in the next image.
However, the correct functioning of the published reports presupposes (in addition to the previous installation of JasperReports Server) also the presence on the server of the connection to the data sources, as specified in section dedicated to the Jasper Server tol of this tutorial. Some elements such as images or references to subreports can be published (and overwritten if already present).
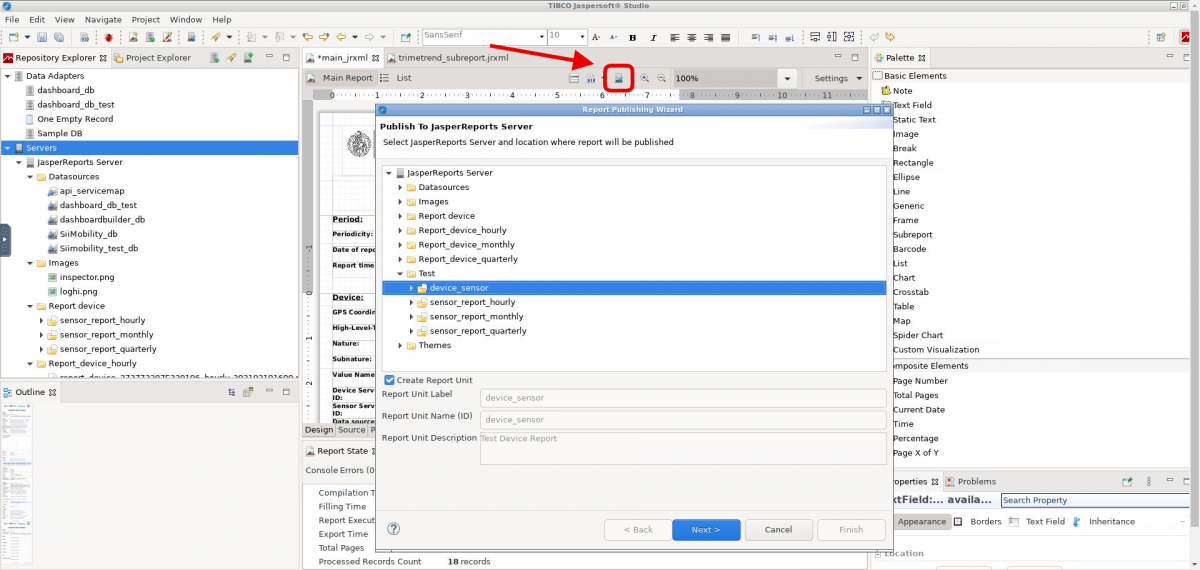
To upload a report in the server, a specific icon is available above the preview area, as shown in the following image. By clicking the upload icon, a new pop up is opened to confirm the template upload.
You can download an example of Report by cliking here.